DIY Epoxy Fireplace Mantel | Step-By-Step Guide
Woodworking enthusiasts, this is for you! Our resident epoxy expert, Steve, created this stunning fireplace mantel a few weeks ago for a client on our Youtube channel, using two types of our epoxy resin. Want to know how he did it? Stay tuned! Full tutorial below:
Skill Level: Beginner/Intermediate/Expert
Estimated Working Time: 2 Days
What You’ll Need:
- Upstart Epoxy Deep Pour Resin
- Upstart Epoxy Table Top Resin
- Upstart Epoxy Powdered Pigments Set
- Fireplace Mold
- Poplar Wood Slab
- Plywood
- Packing Tape
- Tyvek Tape
- Hand Planer
- Belt Sander
- Floating Form
- Grinder
- Adhesive
- Heat Gun
- Orbital Sander
PROJECT PREP: First, we made our mold/form out of plywood and added in our wood slab. We then covered it with Tyvek tape to make it easier to pop our project out of the mold once it's cured. This is important because the tape prevents your epoxy from sticking to your mold, so be sure not to skip this step!
Add silicone to your mold.
We then applied silicone all over the mold- when doing deep pours, leaks can be a disaster, and silicone prevents that! You’re almost ready- be sure to check for debris in your mold before starting.

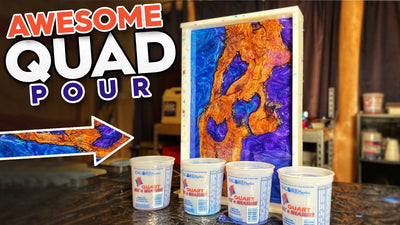
FIRST POUR: Now that your project has been prepped, go ahead and mix up your epoxy. We easily mixed up our Deep Pour, thanks to that 2:1 ratio! We separated our mixed epoxy into buckets of three.
Choose colors from the Powdered Pigments Set.
For this project, we chose the following three colors from our Powdered Pigments Set- Sparkle White (AW4), Silver Black (Y401), and Red Copper (BZ4.) We decided to pour all three colors at the same time to create a beautiful gradient. This is highly recommended if you want to make a more detailed piece!
Pour all three colors in at the same time.
When doing a multiple color pour, make sure both your surface and mold are completely leveled. This way, all the colors get equal shine on the wood slab, preventing one color from overpowering the others. We poured our colors on the mold twice to get high-intensity color payoff.

MORE POURS: We wanted this project to have a 3D look and feel, so we mixed up a batch of clear Deep Pour and poured it over that first layer.
Add in another powdered pigment shade to add unique effects.
Next, we added in a white pigment from our Powdered Pigments Set and mixed it into our leftover epoxy. We let the project cure (anywhere from 12-14 hours) and then added some white swirls into it with one of our mixing sticks. This cool technique gave the project that 3D effect we wanted!
Add a final clear coat of epoxy.
We added one more clear coat of Deep Pour to seal everything in and make sure that this design was going to POP. The glassy finish was perfect!

PLANING & PERFECTING: Now it's time to add a few finishing touches to give the final project a clean finish!
Sand the wood slab for a perfect epoxy resin piece.
We took our project outdoors and hit it with our hand planer, then used a belt sander carefully to flatten it out and cut off the edges. We did this to take off any little high points that may have gone unseen, to reveal the details of the wood slab, and to remove any excess epoxy that may have leaked through.
When using the belt sander, we recommend avoiding using it at an angle, keeping it flat on your surface, and using an orbital sander afterwards to polish it, which gives your piece a clean finish. Lastly, only use the belt sander if you have to! If your project has been measured correctly, there shouldn’t be any uneven parts after your pour.

ADDING BARS: Then, we got our floating form (provided by client) and cut off some of the bars so they wouldn't protrude through the epoxy and ruin the design. We did this by using a grinder with a metal disc- it took a while, but was worth it to make sure that the bars go where the wood slab and epoxy meet. Be patient with this step! Next, we measured and drilled in our pilot holes for the bars.

SANDING: We sanded the wood slab at up to 500-grit and used bond adhesive to fill in any lines or gaps that the epoxy didn’t reach. Finally, we went ahead and water popped it, which brings your colors to the surface and makes the wood grain come alive!

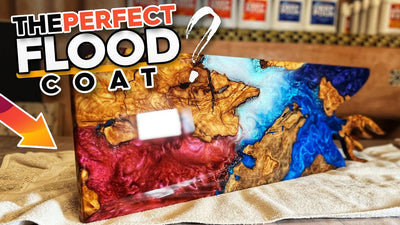
FLOOD COAT: This is where our Table Top comes in! Before pouring, we taped with packing tape (any brand is fine) the sides to prevent drip, mixed up our resin, removed any bubbles, and started to pour! When doing this, make sure there’s a good overflow and that inch of your wood is covered. Lastly, we used a heat gun to remove any excess bubbles.
We decided to add another batch of Table Top and Mica Powder to add another dynamic layer of color. In the mood for a flood coat finish? It’s an optional step, but we highly recommend doing the flood coat to make those colors and details even more vibrant in the wood slab. And that’s all, folks!

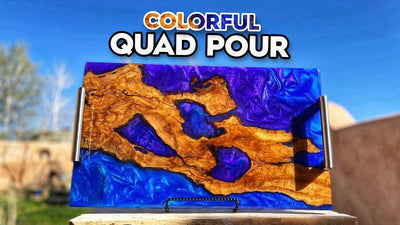
THE REVEAL: