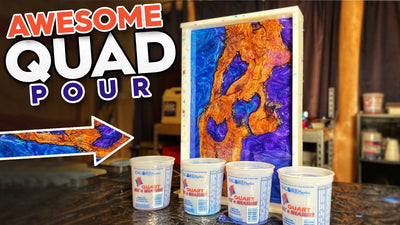
Epoxy Resin Coffee Table Tutorial: DIY Guide
We created this classy coffee table using all three of Upstart Epoxy’s resins, and the outcome was PHENOMENAL. If you’re ready to make a large epoxy resin table, this tutorial is for you! Interested in other surfaces? Learn how to epoxy a table top like a pro!
Skill Level: Beginner/Intermediate/Expert
Estimated Working Time: 48 Hours
What You’ll Need:
- Upstart Epoxy Art Resin
- Upstart Epoxy Deep Pour Resin
- Upstart Epoxy Tabletop Resin
- Alligator Juniper Wood (or any wood you like!)
- HDPE Mold
- Tyvek Tape
- Jig Router
- Circular Saw
- Finishing Oil
SURFACE PREPARATION: Let's kick this off with some surface preparation! We started with an alligator juniper wood slab, but we got a pretty rustic slab that looks like it might’ve been through a fire. DIY Pro Tip: when you get your hands on a piece like this, be sure to get rid of all the excess ashes that are stuck in the wood!
Prepare the wood slab for resin.
Sand off areas that have a lot of extensive burns- we did this down to about 80 grit. Optional: we also like to sand off mill marks and any other bruises- it's a long process but it’s worth it!
Tape off the mold edges.
Then, we grabbed our HDPE mold and sealed up the edges, and both the inner and outer seams. We taped the bottom with Tyvek tape in order to keep the epoxy in the open areas of the wood, and then made sure everything was leveled.
We do all of this so that the epoxy doesn’t have a hard time of adhering to the wood plank. Debris-free surfaces are key when it comes to a perfect epoxy pour because it prevents bonding issues.
Proper surface preparation will help you achieve the outcome you want- be sure not to skip these steps!

TIME FOR A DEEP POUR: What you'll do in this step is one of the most important of all! The deep pour is the shining star of this piece, so make sure to to pay extra attention to detail here.
Prevent undesired wood movement when you pour resin.
Preventing wood movement is the main goal here. To do this, grab some Art Resin and place a little on the underside, so that it’ll stick to your mold and ensure that that piece is not going to move before you add your deep pour. Next, we mixed and poured three gallons of Deep Pour Resin.
Adding epoxy pigment.
We wanted a clean, crisp, contemporary look for this piece, so we went with a water based epoxy pigment for a solid jet black finish. We mixed it in with our deep pour for about 10 minutes to get a seamless blend. Now, you're ready to pour the epoxy on your coffee table!
Pour epoxy on the coffee table.
We poured thoroughly, making sure that no area went untouched, and made sure we got all the detail points, which are the areas that we taped on the underside. DIY Tip: Details are key when doing epoxy wood art, because any lack of attention to detail is noticeable with these materials. Make sure you get all points!

SILICONE SEALANT: Leaks are awful because they can hamper your process, your progress, and most of all, your confidence! Sealing your project with silicone prevents the likelihood of this happening.
Seal the mold using silicone.
We sealed the side of the form/mold with silicone. Always take the necessary steps to ensure you’re doing a leak free pour, future epoxy experts! Now, you’re ready to plane any excess epoxy off of both sides of the table.
Level the resin table.
Next, we got a slab jig router- this is an important step to clean up your epoxy project and make sure that the resin table is going to be level on both sides, especially when working on larger pieces. Leveling the resin table is important if you're planning to use it!

CUTTING & SANDING: These steps give your coffee table a refined, professional look! Doing them also rids us of any epoxy that might have gotten trapped in between the form and wood.
Make sure there's no debris left in the surface.
Again, a crisp look was the end goal for this epoxy resin piece, so it was time to switch off all four sides, starting with the longest side. Next, we squared up the short sides and made sure that we got a straight edge.
DIY Pro Tip: if you're not good with free handing, make sure to take the necessary steps to get a straight and clean line!
If you need help getting your line as straight as can be, use something with a straight edge (we used a board) that you can run a circular saw or slug along. This makes the process so much easier!
Sand for a perfect epoxy resin piece.
Next, we got the grit out starting with 60 grit sandpaper and then went all the way up to 1000, a perfect way to make epoxy shiny smooth. It’s very important to do this, that way there’s no imperfections on your project when it’s flood coat time.
Imperfections are unwanted when doing resin flood coats, because you’ll have to do multiple coats to get it right. If you get it done right the first time, you’ll save yourself some extra epoxy!
Spruce up with a beveled edge.
Then, we went ahead and threw on a classic chamfered beveled edge, just adding to the clean and crisp look.

FLOOD COAT: A flood coat is an epoxy coating that covers the entire surface of a your project. This coat will add gloss and shine to your coffee table, giving it a high quality finish!
Spray alcohol to wipe the surface clean.
Now it's time for the best part- the flood coat! Before we got started, we sprayed our table with some alcohol and wiped the surface clean, which removes any excess dust from sanding.
Highlight the charm of your sophisticated coffee table.
We started our flood coat (which was a fresh batch of Table Top, and it looked great- the black really POPPED against the wood!
Once we were happy with that, we made sure that we had an overflow of epoxy over the edges and that the edges were covered.
Check back for unnoticed imperfections.
Lastly, we checked for any surface tension, which are the little divots the epoxy doesn't quite cover, and then got all of the epoxy drips from the underside with our 40 grit sandpaper.
DIY Pro Tip: if you’re using black mica pigment with your epoxy, be sure to check for any debris within the mixture. Debris sticks out like a sore thumb in black, because it shows everything. Always go back and check!
WORKING THE UNDERSIDE: You might be thinking, nobody's going to see the underside, so why should I do any steps to spruce it up? Well if you want it to look professional, you’re going to want to finish both sides.
Add finishing oil.
To get a nice epoxy food finish, take any finishing oil (we went with Walrus Oil) and rub it onto the underside. Leave the oil on for at least 10-15 hours, and then wipe off any excess from the epoxy.

Attach aluminum table legs.
Almost done! All that’s left is adding legs to your epoxy resin table. We mounted our legs in and got them secured, which is super important if you plan on using the table often!
Once we made sure that the base was adequate, it was all done! A crisp, clean, contemporary looking coffee table! For those looking for something different, use this method on a circular piece of wood to create a round epoxy table or even a DIY epoxy fireplace mantel.

THE REVEAL: